Filed under: ENGINE BUILD KL
Will post results soon

These tests are quite time consuming as you need to install everything and remove everything over and over again to test the multitude of cam degrees.
Filed under: ENGINE BUILD KL
Top end tests, start with valve to valve clearance. We need to know how much we can adjust our cam gears before they valves will have contact with each other. You don’t want to be tuning on the dyno and “hope” your valves don’ contact and ruin all you work.

| intake valve | exhaust valve | clearance |
| 0 | 0 | lots of clearance |
| +4 | 0 | .060″ good |
| +8 | 0 | .050″ good |
| +10 | 0 | .048″ good |
| +10 | +4 | .060″ good |
| +10 | -2 | .055″ good |
| +10 | -4 | .026″ TIGHT!!! |
| 0 | -2 | .060″+ good |
| 0 | -10 | good clearance |
| +4 | -10 | .028″ tight |
| +2 | -10 | .058″ good |
| +6 | -6 | .034″ getting close |
| +6 | -8 | .024″ tight |
From this test it looks like you do not want a separation of 14degrees ie +10 intake and -4exhaust, or +7 intake and -7 exhaust. Doing so would put you in a very tight clearance and very little room for error.
To close off the bottom end we decided to go with some Password JDM magnetic drain plugs to help pull any metallic contaminants that may be floating around during breakin. There are two plugs that come in a set, one for engine and one for tranny.


I took a video showing how strong the magnets are in these drain plugs
Before I close up the oil pan I reinstall the oil pickup with new gaskets.


Now for the oil pan.
We installed the Password JDM oil pan baffle kit to help keep oil where it should be during hard track days.
Take a look:
Before oil pan baffle install

After oil pan baffle install, welding credit goes to my friend Cole. Thanks for doing it so fast and short notice.


Filed under: ENGINE BUILD KL
Installing the pistons and properly clocking the piston rings. Improper clocking of the rings could lead to excessive oil consumption.
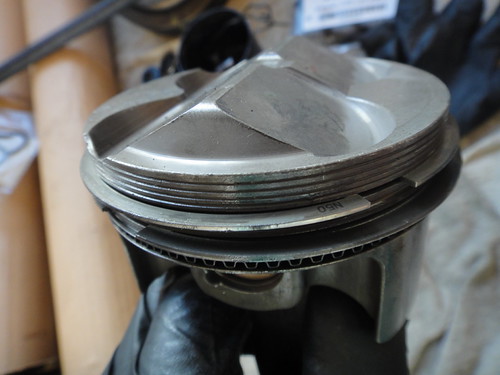

Drop them all in and retorque your rod bolts and we are close to completeing the bottom end.

After install, I turn everything by hand to make sure everything moves smoothly and no binding of any kind.
Filed under: ENGINE BUILD KL
Now that we have all rod bearings in it’s time to close up the seals, brand new Honda oil pump, and a new rear main seal.


Next close up with a new oil pan gasket and bolt up the new baffled oil pan
Filed under: ENGINE BUILD KL
Well, looks like we have a full set of perfectly good and new ACL race rod bearings for a B18C.

The new HX ACL rod bearings with the extra oil clearance came in. Hopefully these give enough clearance that i would feel safe running them.


After redoing the test, they are still on the tighter range of Honda’s recommendation but at least they are still with that range. So, we are good to go on the rod bearings and start closing up the bottom end.

Filed under: ENGINE BUILD KL
Checking the connecting rod bolts I found that the tolerance is borderline too tight. It is a really really tight tolerance that i’m not comfortable running for this particular build.
You can see here Honda recommends .0015~.002″ clearance for their b18c typeR setups.

Skunk2 recommends .0015~.003″

The tolerance results with the standard size ACL race bearings.


Doing some research I found that ACL does have a more oil tolerance bearing available, .001″ of extra clearance. So we overnight shipped these bearing and hopefully it arrives soon so we can test again. Once we find that it all fits we can move onto the clay testing(valve to piston clearance, and valve to valve clearance and get this back into the car so they can race 🙂
Filed under: ENGINE BUILD KL
Here is a closer look at the oiling jets in the block and how they sit.


I tried moving the jet over to the left so that it still sprays the center of the piston, however, I did find that it starts having contact with the crank shaft itself.


So next thing I tried was to move the jets over the right, then angle the jet back to the center.


all done

Wow that was unexpected waste of time, now back to the regular rod bearing test
Filed under: ENGINE BUILD KL
Prepping the rods and pistons for testing.

Separate the rod caps and get the ACL race bearings pressed in.


Skunk2 ARP rod bolts

While putting the rods and piston in the cylinder I noticed that the piston was not allowing the rod to go all the way to the crank journal. With closer inspection I found that the supertech piston was contacting the oiling jet nozzle. The strutted piston design doesn’t work with this setup.

I will try to bend the nozzle to clear the piston, while hopefully still lubricating and cooling the piston. I feel this would definitely be a good feature to keep, especially for a road racing setup…. until part2….
